
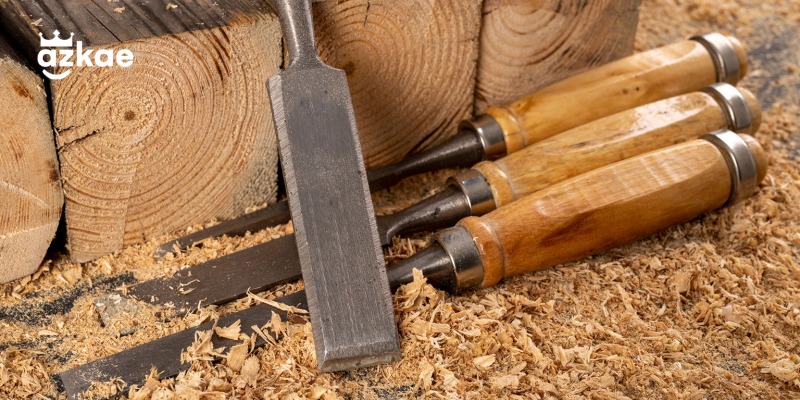
Have you ever tried to make a precise cut with a dull chisel? If you have, you know how frustrating and dangerous it can be. A flat chisel can ruin your workpiece, damage your tools, and cause injuries.
That’s why sharpening your chisels is one of the most essential skills for any woodworker. In this blog post, I will show you how to sharpen your chisels for perfect cuts every time.
You will learn the basics of chisel anatomy, the different types of sharpening stones and methods, and how to hone and polish your chisels to a razor-sharp edge. These simple steps can improve your woodworking results and help you enjoy your craft more.
What You Need To Sharpen Your Chisels
Sharpening your chisels is an essential skill for any woodworker. A sharp chisel can make clean and accurate cuts, while a dull one can cause tear-out and frustration.
To sharpen your chisels, you will need the following tools and materials:
- A sharpening stone with coarse, medium, and fine grits. Depending on your preference, you can use either a water stone or an oil stone. A water stone must be soaked before use, while an oil stone needs to be lubricated with petroleum oil. Both types of stones effectively remove metal and create a sharp edge.
- A honing guide. This device holds your chisel at a consistent angle to the stone, and it helps you maintain the correct bevel angle and avoid rounding over the edge. You can adjust the honing guide to different angles depending on the type and use of your chisel.
- A strop. This piece of leather or cloth is used to polish and refine the edge of your chisel after sharpening. It removes any burr or wire edge that may have formed during honing and creates a mirror-like finish. You can apply some honing compound or polishing paste to the strop for better results.
- A rag or paper towel. This removes excess oil or water from your chisel and stone after sharpening.
To choose the right type of sharpening stone and lubricant for your chisels, you need to consider the hardness and quality of your steel, as well as your personal preference and budget.
Generally speaking, water stones are faster and easier to use than oil stones, but they also wear out faster and need more maintenance. Oil stones are slower and harder to use than water stones but also last longer and require less maintenance.
Here are some links or images of the recommended products and where to buy them:
Water stone
Oil stone
Honing guide
Strop
How To Sharpen Your Chisels Step By Step
Sharpening your chisels is an essential skill for any woodworker, whether you are a beginner or a seasoned pro. A sharp chisel can distinguish between a clean and precise cut and a messy and frustrating one.
Do not worry; I will show you how to sharpen your chisels using simple tools and techniques.
You will learn how to:
Set the correct angle for your chisel edge
The angle of your chisel edge depends on the type of chisel and the task you are using it for. Generally, a lower angle (20 to 25 degrees) is better for paring and slicing, while a higher angle (30 to 35 degrees) is better for chopping and mortising.
You can use a protractor or an angle gauge to measure the angle of your chisel edge or a reference chart showing the recommended angles for different types of chisels.
Use a honing guide to maintain a consistent angle.
A honing guide is a device that clamps and guides your chisel along the abrasive surface, ensuring that you keep the same angle throughout the sharpening process. Different honing guides, such as side-clamp, roller, and eclipse-style guides, are available.
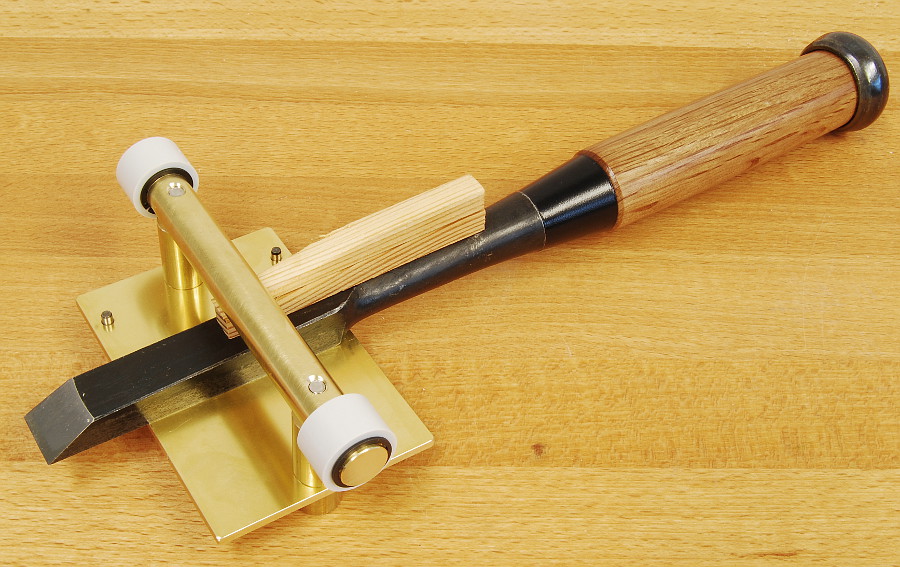
You can choose the one that suits your preference and budget. To use a honing guide, you need to adjust it to match the angle of your chisel edge, then clamp your chisel securely in place. Ensure the border is parallel to the abrasive surface and the guide is not wobbling or slipping.
Choose the suitable abrasive for your sharpening needs
The abrasive material removes metal from your chisel edge and creates a new edge. Many abrasives are available, such as Waterstones, oilstones, diamond plates, sandpaper, etc. Each type has advantages and disadvantages, such as speed, cost, maintenance, etc.

You can choose the one that suits your preference and budget. Generally, you need at least two or three different grits of abrasives:
- A coarse grit (around 220 to 400) for shaping and repairing the edge
- A medium grit (about 800 to 1200) for refining and smoothing the edge
- And a fine grit (around 4000 to 8000) for polishing and honing the edge.
Progress from coarse to fine grits to achieve a razor-sharp edge
To sharpen your chisel effectively, start with the coarsest grit and work up to the finest grit, removing the scratches and burrs from the previous grit.
You can use either a circular or a back-and-forth motion to move your chisel along the abrasive surface, applying moderate pressure and keeping the angle consistent.
You should check your progress frequently by looking at the edge under a bright light or a magnifying glass. You should see a shiny line along the edge that indicates that you have reached the end of each grit.
You should also feel a slight burr on the back of the chisel that indicates that you have removed enough metal from the edge.
Check for sharpness using various methods
There are several ways to test if your chisel is sharp enough for your needs. One way is to cut a piece of paper or wood with your chisel and see if it makes a smooth and clean cut without tearing or crushing.
Another way is to shave some hair from your arm or leg with your chisel and see if it cuts easily and painlessly. A third way is to look at the light reflection on your chisel edge and see if it is bright, even without dull spots or nicks.
Avoid overheating your chisel and damaging the steel
Overheating your chisel can cause it to lose its hardness and temper, making it dull and brittle. Avoid using too much pressure or speed when sharpening your chisel to prevent overheating.
You should also use water or oil as a lubricant to reduce friction and heat build-up on the abrasive surface. You should also frequently dip your chisel in water or oil to cool it down and prevent it from overheating.
Polish the back of your chisel for a smooth and flat surface
The back of your chisel is the flat side opposite to the edge. It is essential to polish it because it affects how well your chisel cuts and how easy it is to sharpen it in the future.
To polish the back of your chisel, flatten it first by rubbing it on a coarse abrasive until you remove any hollows or high spots. Then you need to polish it by rubbing it on progressively finer abrasives until you achieve a mirror-like finish.
How To Maintain Your Chisels In Good Condition
Chisels are essential tools for any woodworker but require regular maintenance to keep them sharp and effective. I will share some tips on sharpening your chisels, protecting them from rust and damage, and learning more about chisel sharpening and woodworking skills.
The frequency of sharpening your chisels depends on how often you use them and how you store them. If you use your chisels frequently, you may need to sharpen them every few weeks or days.
If you use them occasionally, you may only need to sharpen them every few months or once a year. However, if you store your chisels in a damp or humid environment, you may need to sharpen them more often to prevent rust and corrosion.
To protect your chisels from rust and damage, apply oil or wax to the metal parts after sharpening and storing them. You can use mineral oil, machine oil, camellia oil, or any other non-drying oil that does not contain acids or additives.
You can also use paste wax or beeswax for extra protection. You should also store your chisels in a dry and ventilated place, preferably in a protective case or a wooden rack that keeps them separated and prevents them from banging against each other.
You can check out online resources or courses offering detailed instructions and demonstrations to learn more about chisel sharpening and woodworking skills.
Some of the resources I recommend are:
- The Wood Whisperer: A website and YouTube channel covering various woodworking topics, including chisel sharpening.
- Paul Sellers: A website and YouTube channel that teaches traditional woodworking skills, including sharpening chisels by hand without a honing guide.
- Fine Woodworking: A magazine and website that offers articles, videos, and courses on woodworking techniques and projects, including chisel sharpening.
I hope these tips help you maintain your chisels in good condition and enjoy woodworking more.
Conclusion
You have reached the end of this blog post on sharpening your chisels for perfect cuts every time. I hope you have learned something useful and valuable from this article. Sharpening your chisels is not only a matter of convenience but also a matter of safety and quality.
By following the tips and techniques I have shared with you, you can ensure that your chisels are always ready to perform at their best. You can also extend their lifespan and save money on buying new ones.
Now it’s your turn to take action. What are you waiting for? Grab your chisels and start sharpening them today. You will be amazed by the difference it makes in your woodworking projects. And don’t forget to share your results with me and other readers in the comments section below.
I would love to hear from you and see your work. You can also share this post with your friends and family who might be interested in learning how to sharpen their chisels.
Thank you for reading and participating in this community. I appreciate your time and attention. Stay tuned for more posts on woodworking tips and tricks in the future. Until then, happy sharpening!